There are certain times of day that photographers call “magic hours” – the moments just after sunrise and just before sunset when the sky takes on a beautiful golden or blue hue. These times, known as the Golden Hour and Blue Hour respectively, are treasured by photographers for the way they can transform an ordinary scene into a stunning work of art. In this blog, we’ll delve into the art and science of photographing during these magical hours, sharing tips and techniques to help you capture the beauty of these fleeting moments. Whether you’re a seasoned pro or just starting out, we’re confident that you’ll come away with a new appreciation for the power of light and the beauty of the world around us.
What’s Blue Hour?
Blue hour is the period of twilight before sunrise or after sunset when the sun is below the horizon, but indirect sunlight illuminates the sky. During this time, the sky takes on a blue hue, creating a tranquil atmosphere. Blue hour is a short window of time that lasts for about an hour, making it a coveted period for photographers to capture stunning shots.
Blue hour photography is the art of capturing the beauty of this magical hour through a lens. To capture the essence of blue hour, photographers use various techniques, such as playing with light, shadows, reflections, and composition, to create a captivating image that captures the ethereal beauty of this period.
Importance Of Blue Hour Photography
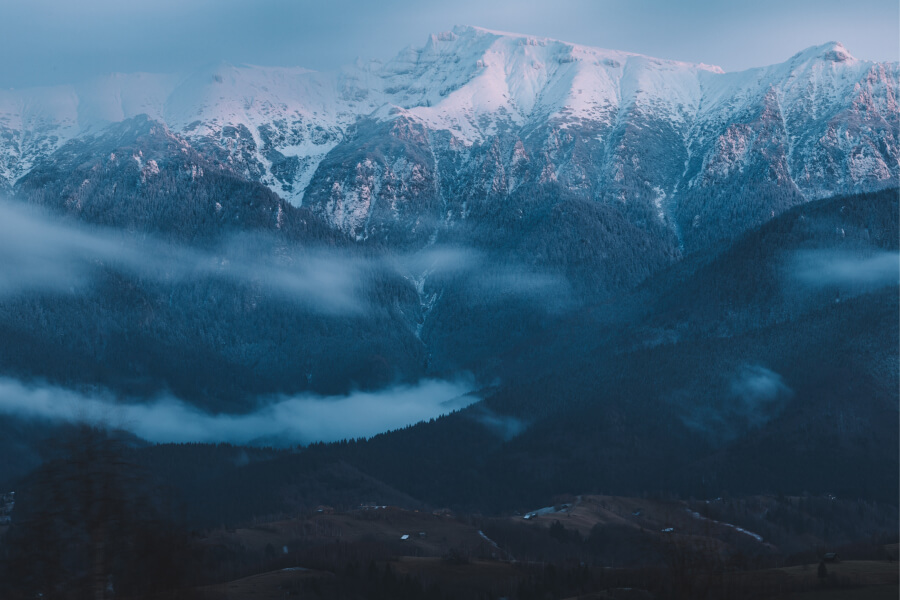
Mountain view at blue hour after sunset
Blue-hour photography is important for several reasons. Firstly, it allows photographers to capture unique shots that are not possible during the day or night. The blue hue of the sky adds a calming and soothing effect to the photograph, creating a distinct mood and atmosphere. Additionally, the soft and diffused light during this time creates a natural filter, making it easier to capture details and colors that might be lost during other times of the day. Lastly, blue hour photography can help to develop and enhance photography skills by challenging photographers to experiment with different techniques and settings to capture the perfect shot.
Blue Hour Photography Techniques & Tips
When it comes to blue hour photography, the right camera settings and composition can make all the difference in capturing a stunning shot. Here are some camera settings and composition tips to help you elevate your blue-hour photography game:
Camera Settings
- Use a tripod: Blue hour photography often requires longer shutter speeds to capture the soft light and movement of the sky, so using a tripod will help keep your camera steady.
- Shoot in manual mode: Shooting in manual mode gives you more control over your camera settings, which is important in low-light conditions.
- Use a low ISO: A low ISO setting will help reduce noise in your images, resulting in a cleaner and sharper image.
- Adjust your white balance: The blue hue of the sky during blue hour can sometimes cause the image to look too cool, so adjust the white balance to add warmth to the image.
- Use a slower shutter speed: A slower shutter speed can create a dreamy effect and capture the movement of the sky, resulting in a stunning image.
Tips
- Incorporate foreground interest: Adding foreground interest can create a sense of scale and add depth to the image.
- Experiment with different angles: Don’t be afraid to get creative with your composition by experimenting with different angles and using perspective in your photography, such as shooting from a low angle or including elements in the foreground.
- Keep it simple: Blue hour photography is all about creating a calm and serene mood, so keep your composition simple and avoid cluttered or busy scenes.
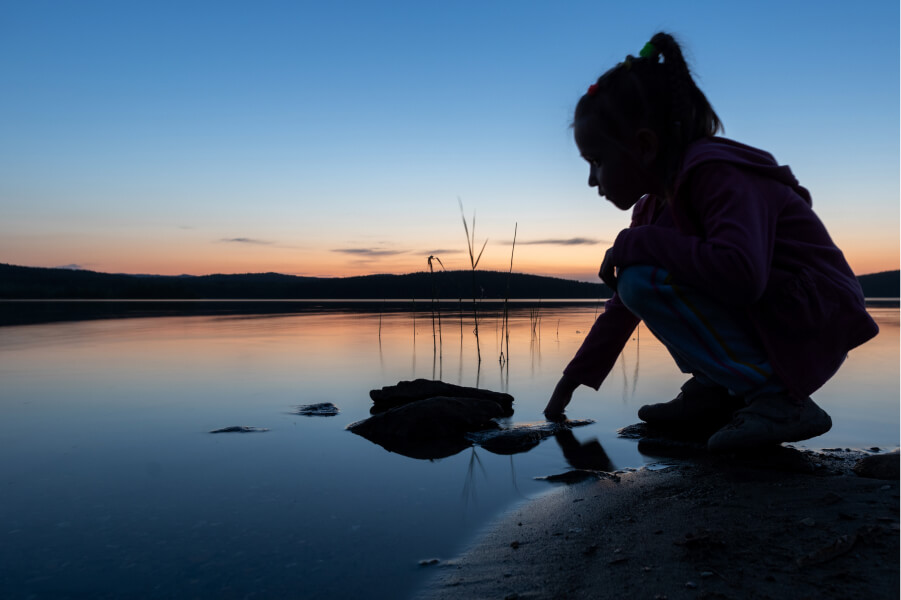
Silhouette of a child touching the lake water at sunset during blue hour
Improving your blue-hour photography skills takes practice, experimentation, and patience. One way to improve is to scout out locations in advance and plan your composition ahead of time. Additionally, taking multiple shots with different camera settings and compositions will help you learn what works best for different scenes.
What Is Golden Hour Photography?
Golden hour is a term used to describe a period just after sunrise or just before sunset when the light is softer, warmer, and more golden in color. It is also known as the magic hour or the golden time. This time of day is highly sought after by photographers for its unique and flattering light.
Golden hour photography is a technique used by photographers to capture the warm, golden light of the sun during the golden hour. The warm light creates a soft, dreamy effect that can enhance the mood and emotion of a photograph. This technique can be used in a variety of photography genres, including landscape, portrait, and street photography.
Importance Of Golden Hour Photography
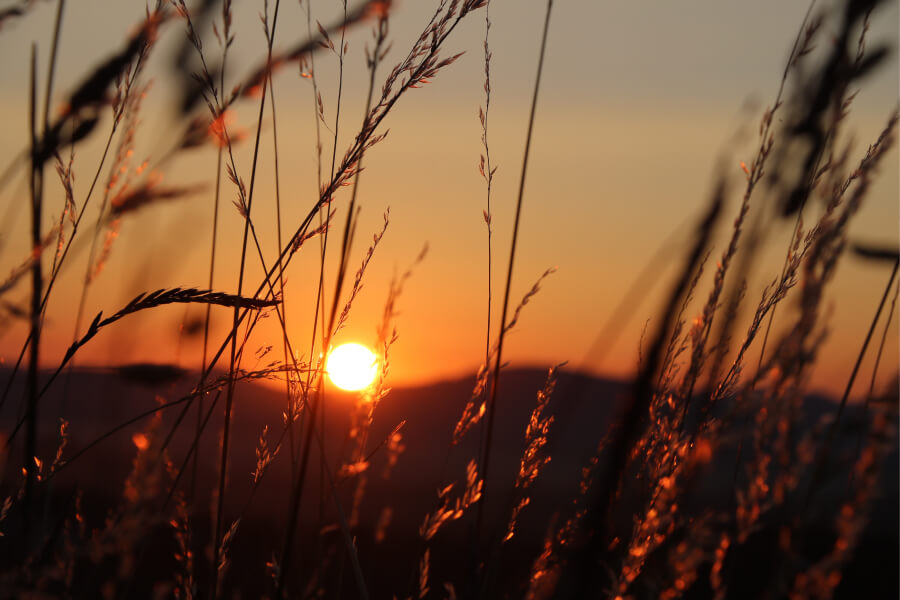
Sun ready to set down behind the mountain spreading the golden gleam all around
The importance of golden hour photography lies in the unique and beautiful light that it provides. The warm, soft light can create a sense of depth and emotion in a photograph, making it more compelling and visually striking. Golden hour photography can also add a sense of warmth and intimacy to a photo, making it perfect for capturing special moments and memories.
In addition, the golden hour is a brief window of time each day, and capturing it requires careful planning and timing. Photographers must be prepared and ready to shoot at the right moment to capture the golden hour light before it fades. This makes golden hour photography a challenging but rewarding pursuit for photographers.
Overall, golden hour photography is an essential technique for any photographer looking to capture the unique and beautiful light of the golden hour. Its ability to enhance the mood and emotion of a photograph makes it a powerful tool for creating stunning and memorable images.
Camera Settings
- Use manual mode: Shooting in manual mode gives you complete control over your camera settings, allowing you to adjust the exposure and other settings to capture the perfect shot.
- Set a low ISO: To capture the warm, golden light of the golden hour, it’s best to use a low ISO setting to reduce noise and capture a clean image.
- Choose a wide aperture: A wide aperture (low f-stop number) will create a shallow depth of field, which can be used to create a soft, dreamy effect in your photos.
- Use a slow shutter speed: A slower shutter speed can help to capture movement and create a sense of motion in your photos, particularly if you are shooting landscapes.
Composition
- Look for interesting foreground elements: Using foreground elements can help to create depth and add interest to your photos.
- Use leading lines: Leading lines can help to draw the viewer’s eye into the image, creating a sense of movement and flow.
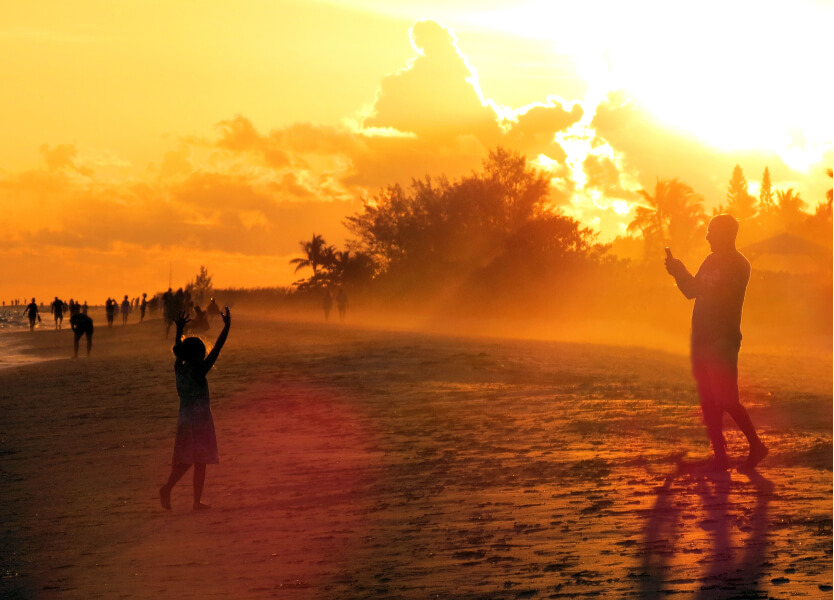
Golden Hour at the Beach
- Incorporate reflections: The warm, golden light of the golden hour can create beautiful reflections in water and other reflective surfaces, making for stunning compositions.
Tips:
i) Plan your shoot ahead of time: Knowing the location, time of day, and desired composition ahead of time can help you to make the most of the golden hour light.
ii) Experiment with different angles and perspectives: Don’t be afraid to try new angles and perspectives, such as shooting from a low angle or using a telephoto lens.
iii) Keep an eye on the light: The light can change quickly during the golden hour, so be prepared to adjust your settings and composition as needed.
Blue hour and golden hour are two periods of the day when photographers can capture stunning images of the world around us. While both periods occur during the transition between day and night, they offer vastly different color palettes, temperatures, and moods.
Differentiating Between Blue & Golden Hour Photography
To differentiate between the blue hour and golden hour in photography, there are a few key things to keep in mind. Firstly, the color temperature of the light will differ, with the blue hour being cooler and the golden hour being warmer. Secondly, the mood and atmosphere of the two periods are distinct, with blue hour creating a serene and peaceful ambiance and golden hour creating a romantic and dreamy vibe. Finally, the angles and direction of the light will differ, with blue hour having a softer and more diffuse light and golden hour casting longer and more dramatic shadows.
Blue hour and golden hour are two distinct periods of the day that offer photographers the opportunity to capture stunning images with unique colors, temperatures, and moods. By understanding the differences between the two, photographers can adjust their camera settings and composition to capture the beauty of each period in all its glory.
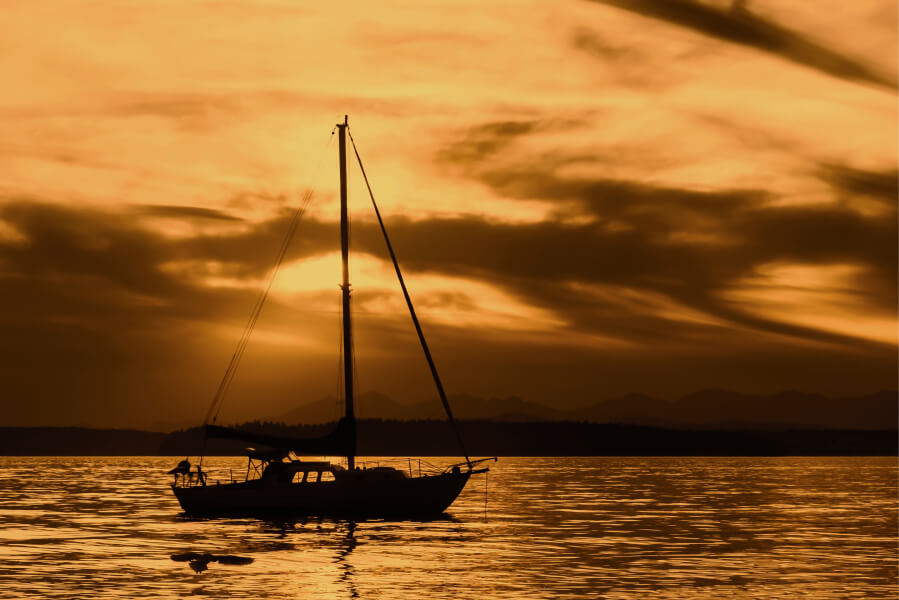
Silhouette of a Sailboat During Golden Hour
Experimenting with both blue and golden hour photography is crucial for improving one’s photography skills. It challenges photographers to experiment with different techniques and settings, from playing with light, shadows, reflections, and composition, to capturing the perfect shot. By embracing the unique beauty of these periods and experimenting with photographers can develop their skills and enhance their creativity, taking their photography to new heights.
So, whether you’re chasing the golden light or capturing the serenity of blue hour, remember to experiment, have fun, and embrace the unique beauty of these magical periods. Who knows what kind of stunning images you might capture? Keep clicking, keep experimenting, and keep creating!